"It works on my machine" is usually true, and that's the actual problem. Your machine has a specific Node.js version installed, specific global packages, specific environment variables set months ago and forgotten about. None of that travels with your code when you hand it to a teammate, push it to a server, or deploy it to a platform that has none of your local setup. Docker exists to package a Node.js app together with everything it needs to run, so it behaves the same way regardless of what's installed on the machine underneath it.
This article walks through Docker from the ground up for a Node.js developer with little or no container experience: what an image and a container actually are, how to run your first one, and how to package a real Node.js app yourself, including the mistakes that make Node.js images slower and larger than they need to be.
The Problem Docker Actually Solves
Before Docker, "environment parity" meant writing a setup document: install this exact Node.js version, these system packages, set these environment variables, hope nothing on the target machine conflicts. Every new team member, every new server, every CI runner repeated that setup by hand, and small differences between them caused real bugs: a native dependency compiled against a different Node ABI, a missing OS package, a Node version one minor release off from what the code was tested against.
A container solves this by bundling an application with its entire runtime environment (the Node.js runtime, system libraries, configuration) into a single unit that runs the same way on any machine with a container engine installed. It's not a full virtual machine: it doesn't boot its own operating system kernel. Instead, it uses isolation features of the host's kernel to behave like an independent system while staying lightweight enough to start in under a second and run many of them side by side on one machine.
Images vs Containers: The Distinction That Actually Matters
Two terms get used interchangeably by beginners, and getting them straight early saves a lot of confusion later.
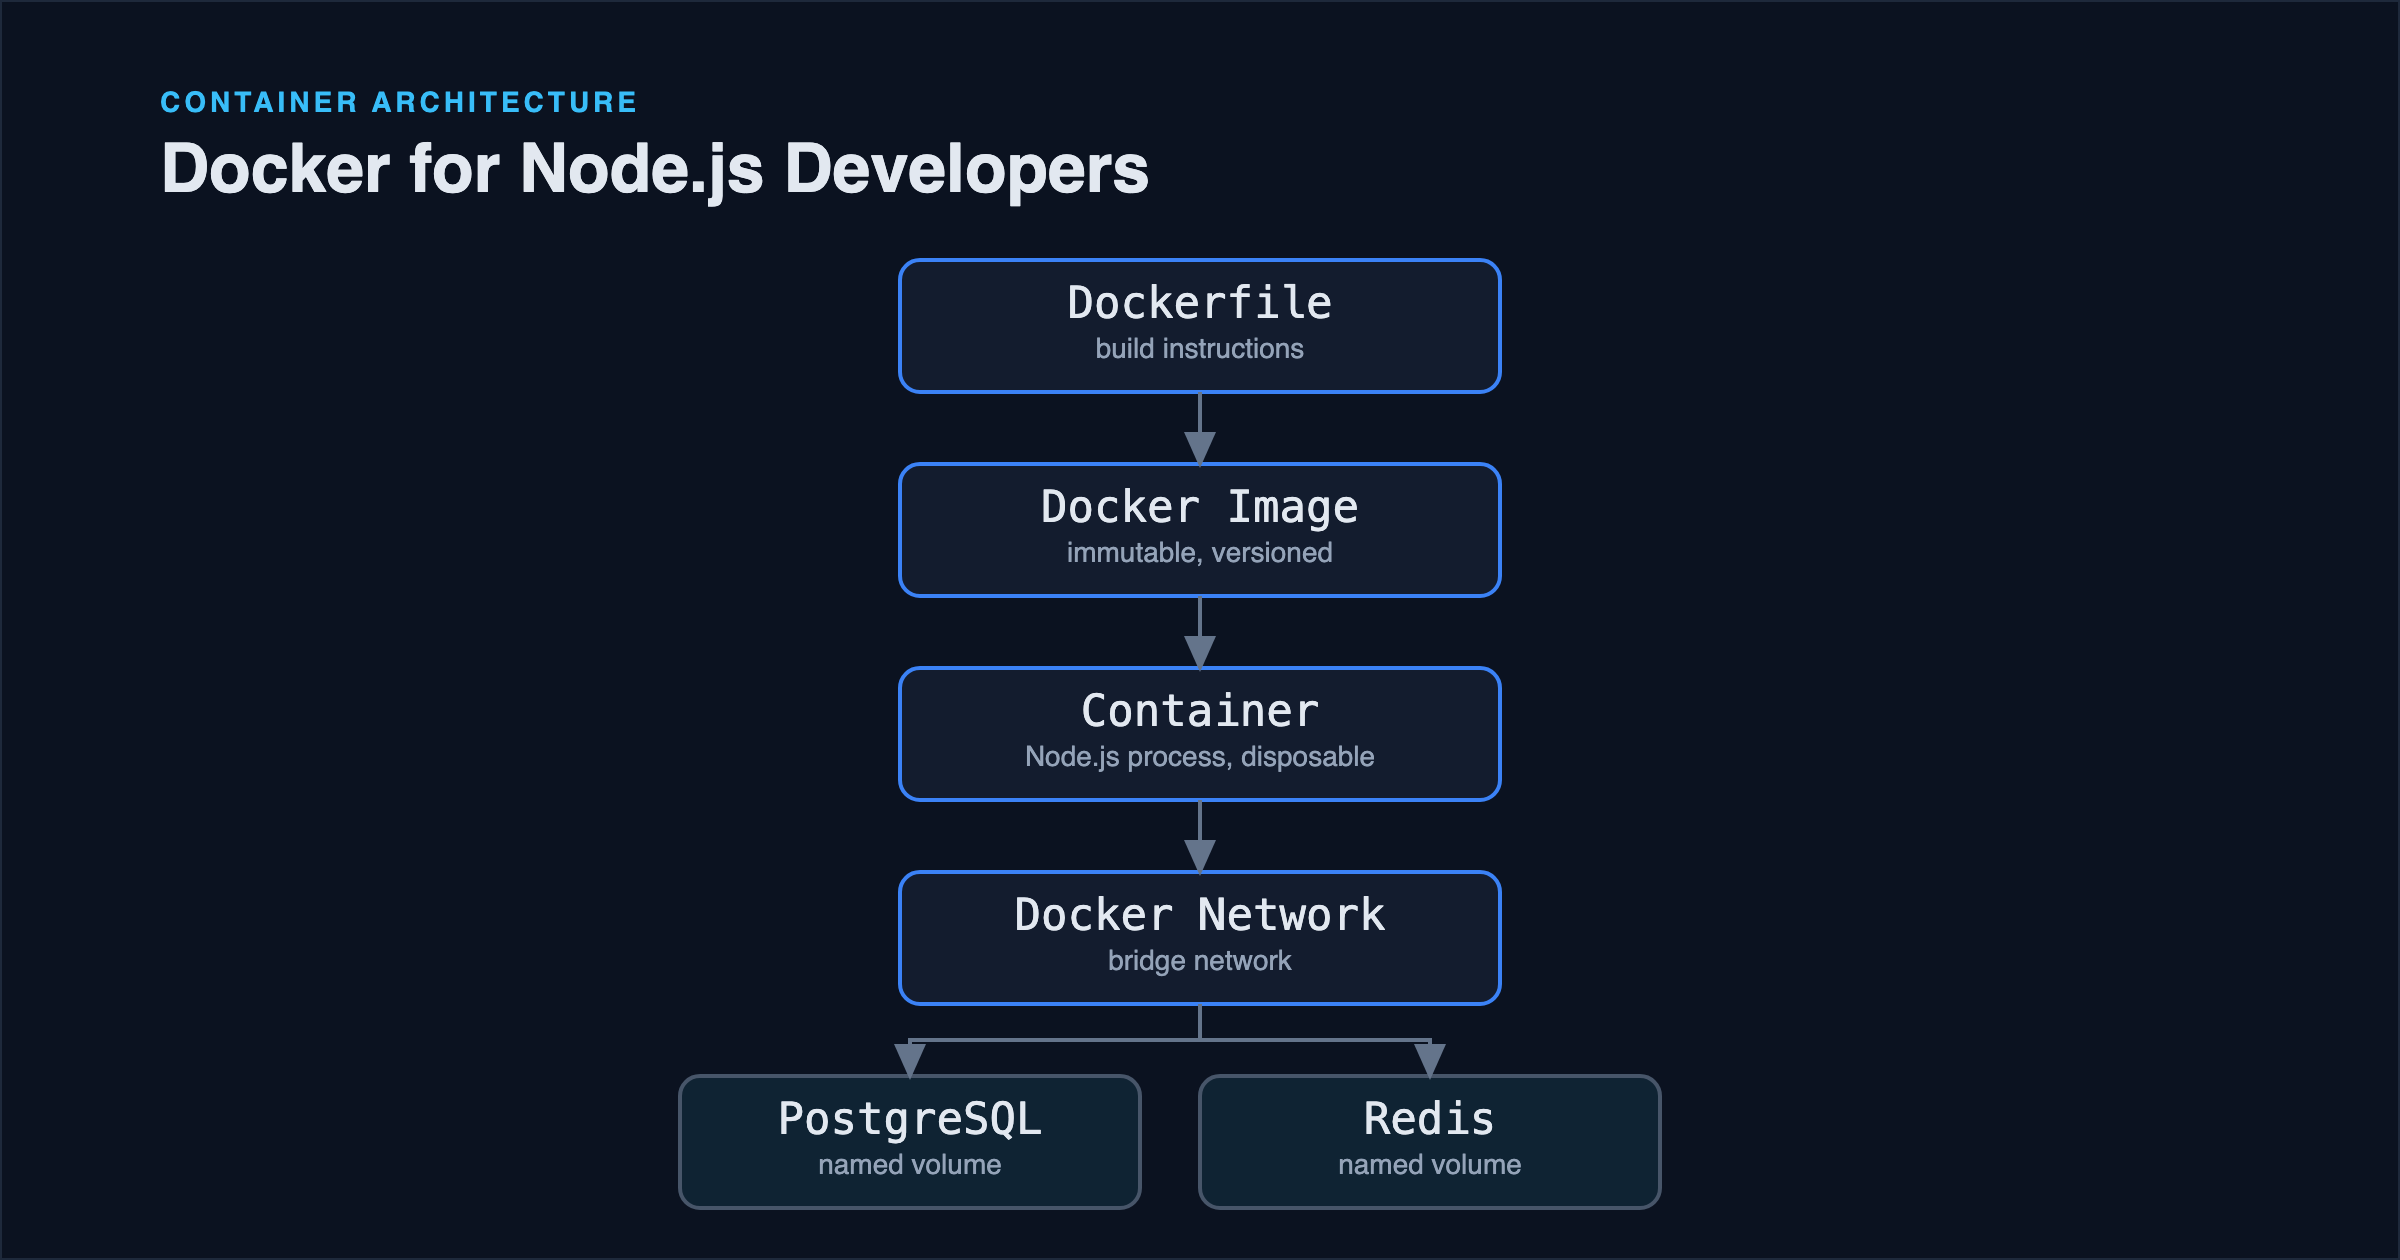
A Docker image is a read-only template: a filesystem snapshot plus metadata (what command to run, which ports it expects to use, default environment values) produced by building a Dockerfile. An image doesn't run anything by itself: it's an artifact, similar to an installer file.
A container is a running instance of that image, with a thin writable layer on top for anything the running process changes. You can start several containers from the same image at once, and each gets its own isolated process and filesystem writes: none of which is shared back into the image itself.
The practical consequence for Node.js developers: containers are disposable by design. If your app writes anything to disk that you care about (uploaded files, a SQLite database, log files you want to keep) and you don't explicitly persist it, it disappears the moment the container is removed. This trips up almost everyone coming from a traditional server, where the filesystem is just... there, permanently, until someone deletes it.
Running Your First Container
Before writing a Dockerfile, it's worth seeing a container run. With Docker installed, this single command downloads a small test image and runs it:
docker run hello-world
Docker checks whether the hello-world image exists locally, downloads it if not, creates a container from it, runs it, and the container prints a short message and exits. That's the entire lifecycle in miniature: pull an image, start a container from it, the container does its job, it stops.
A few commands you'll reach for constantly while learning:
docker ps            # list running containers
docker ps -a         # list all containers, including stopped ones
docker images        # list images you've pulled or built locally
docker rm <id>       # remove a stopped container
docker rmi <id>      # remove an image
Containers that have stopped don't disappear automatically: they stick around until removed, which is useful for debugging (you can inspect why one exited) but also means docker ps -a tends to fill up with old containers if you never clean up.
A Working Dockerfile for a Node.js Service
Here's a Dockerfile for a typical Node.js HTTP service, with each instruction explained:
FROM node:20-alpine
WORKDIR /app

COPY package.json package-lock.json ./
RUN npm ci --omit=dev

COPY . .

EXPOSE 3000
USER node
CMD ["node", "index.js"]
Read top to bottom, this says: start FROM an existing image that already has Node.js installed on a small Linux base, set /app as the working directory inside the container, copy in the dependency manifest files, install dependencies, copy in the rest of the source code, document that the app listens on port 3000, run as the non-root node user rather than root, and finally, CMD specifies the command that runs when a container starts from this image.
Build it, then run a container from it:
docker build -t my-node-app .
docker run -p 3000:3000 my-node-app
-t my-node-app tags the image with a name so you can refer to it later instead of a generated ID. -p 3000:3000 maps port 3000 on your machine to port 3000 inside the container: without this flag, the app is running inside the container but nothing on your host machine can reach it. This is one of the most common "it's not working" moments for beginners, and it's almost always a missing or mistyped -p.
Why the Copy Order Matters
Notice package.json is copied and dependencies installed before the rest of the source code is copied in. This isn't arbitrary ordering: Docker builds images in layers, and caches each layer based on its inputs. If you copied everything and then ran npm ci, any source code change would invalidate the cache for the install step too, forcing a full dependency reinstall on every single build. Splitting the copy means the install step only re-runs when package.json or the lockfile actually changes, which on a real project is the difference between a two-second rebuild and a ninety-second one.
Why USER node
By default, processes inside a container run as root unless told otherwise. The official Node.js images ship a non-root node user specifically so you don't have to create one yourself. Running your application as root inside the container is unnecessary risk. If a dependency has a code execution vulnerability, root-in-container is a meaningfully worse position than a scoped user, even with container isolation as a boundary.
Why Multi-Stage Builds Matter for Production Images
The Dockerfile above works for plain JavaScript, but most real Node.js services compile TypeScript, and you don't want your devDependencies (TypeScript, test runners, linters) sitting in the image you deploy. Multi-stage builds solve this by using one stage to build and a separate, clean stage to run:
FROM node:20-alpine AS builder
WORKDIR /app
COPY package.json package-lock.json ./
RUN npm ci
COPY . .
RUN npm run build

FROM node:20-alpine AS runner
WORKDIR /app
ENV NODE_ENV=production
COPY package.json package-lock.json ./
RUN npm ci --omit=dev
COPY --from=builder /app/dist ./dist
USER node
EXPOSE 3000
CMD ["node", "dist/main.js"]
The builder stage has TypeScript and every dev tool available. The runner stage only ever receives dist/ (the compiled output) copied across via COPY --from=builder. Everything else from the build stage, including node_modules with dev dependencies, is discarded. The final image is smaller and has a meaningfully smaller attack surface, since tools that can execute arbitrary code (build scripts, compilers) simply aren't present at runtime.
Networking: How a Container Reaches a Database
A natural question once you understand that containers are disposable: if a container can't reliably keep files on disk, where does your PostgreSQL or Redis data live?
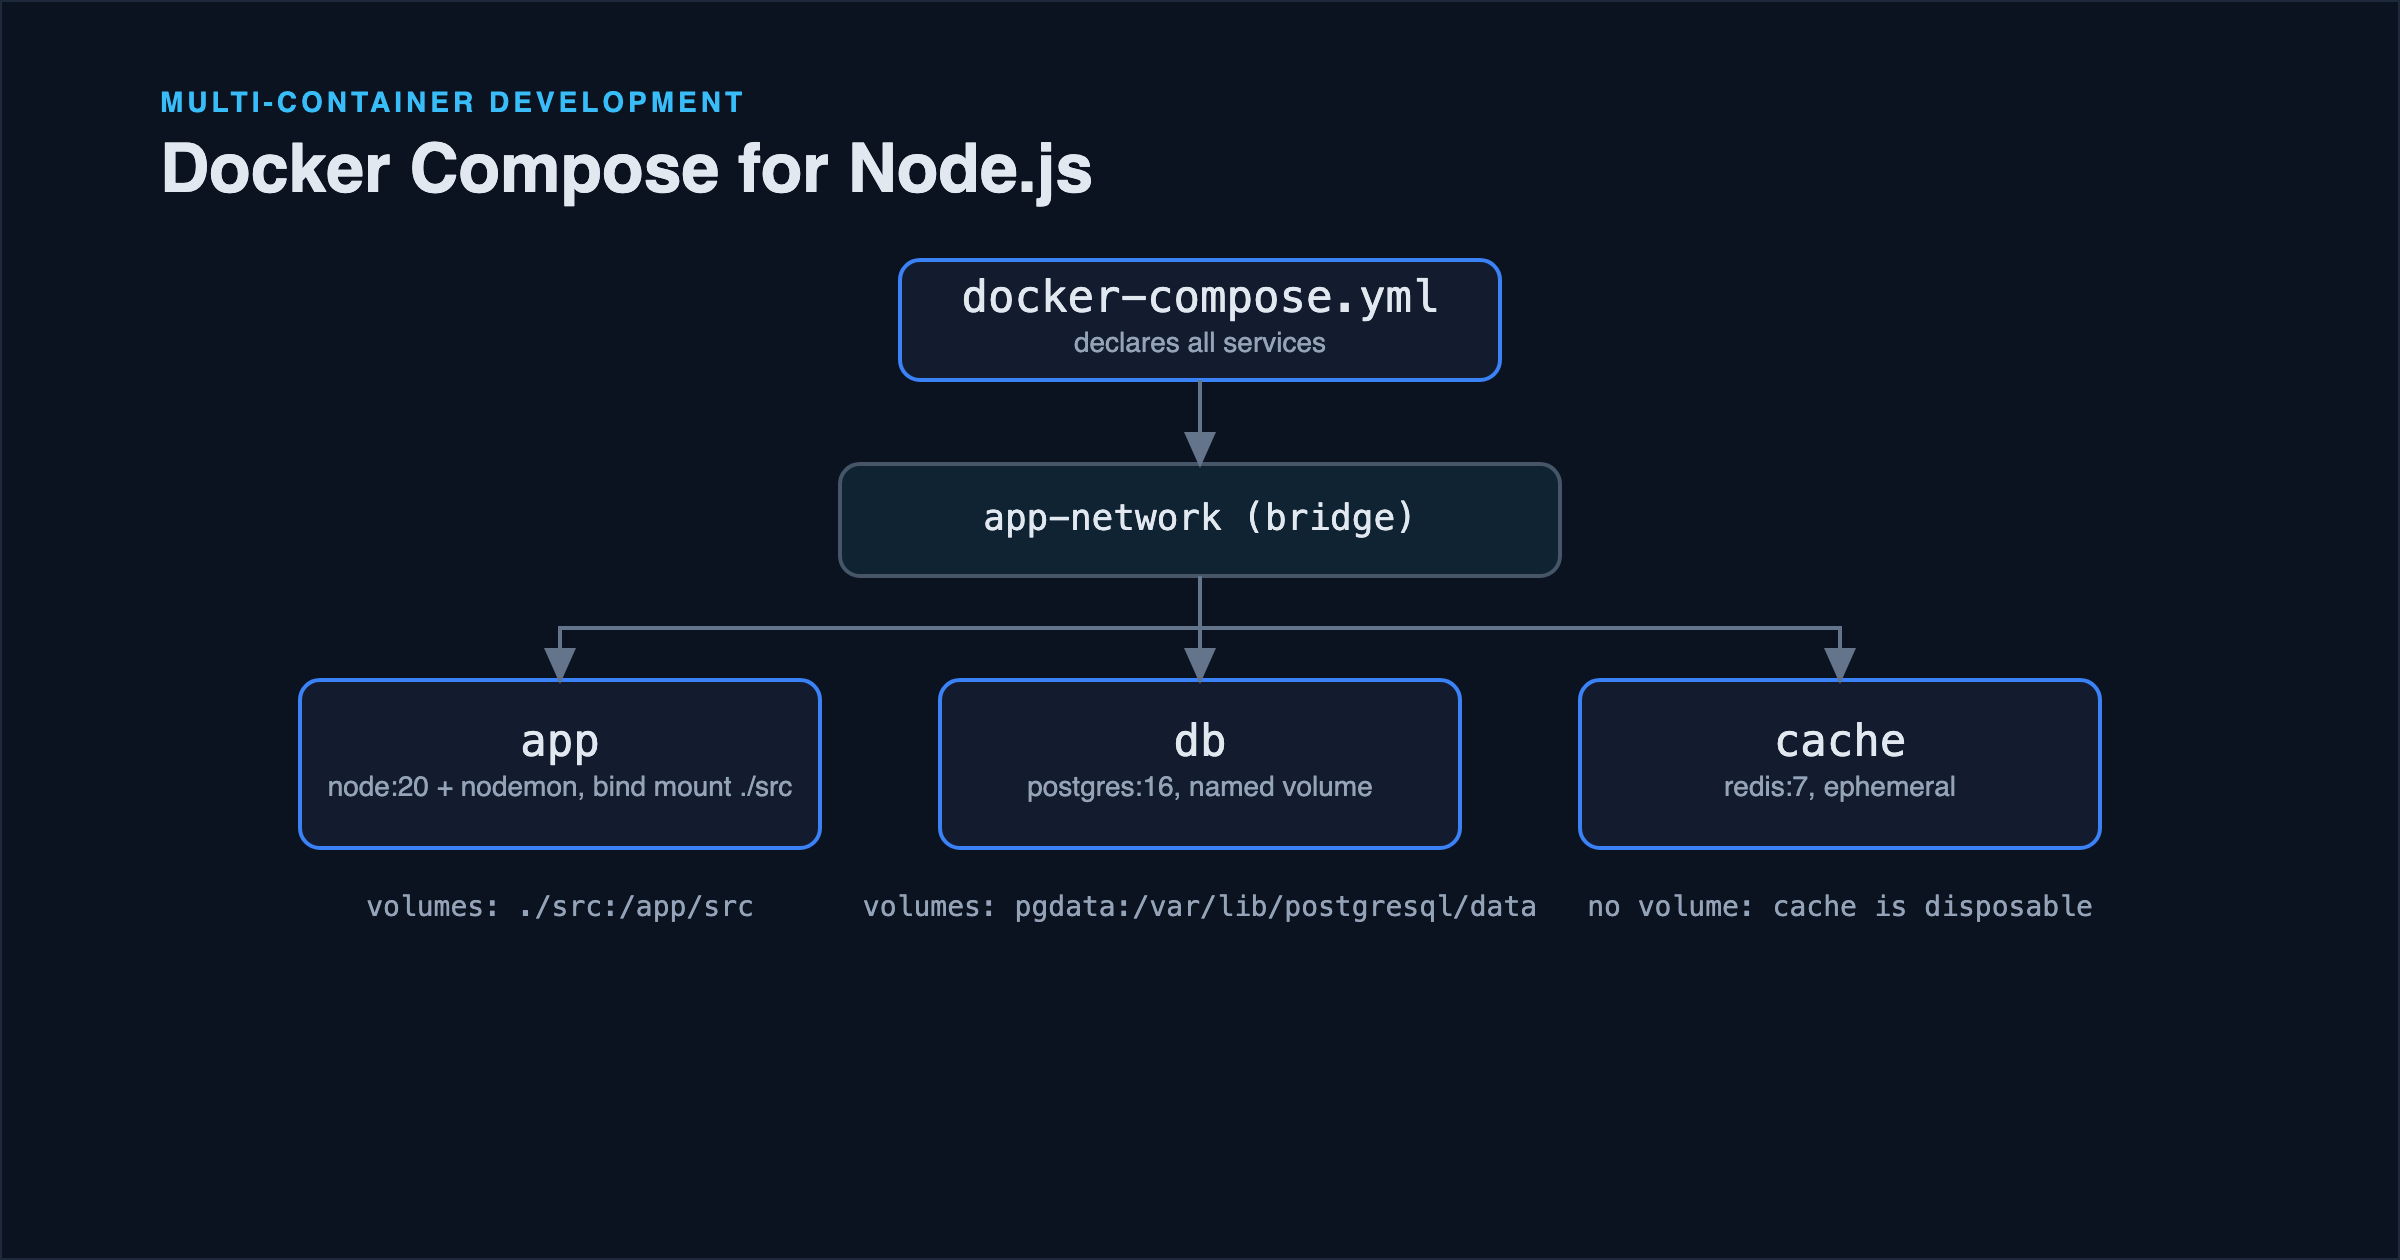
The answer is that the database runs in its own container, and your Node.js app container talks to it over a Docker network rather than localhost. Docker's networking gives every container on the same user-defined network a resolvable hostname equal to its container name. If your database container is named db, your app connects to it as db:5432, not localhost:5432: this catches nearly everyone the first time, because localhost inside a container refers to that container itself, not the host machine or a sibling container.
The database container then uses a named volume to keep its data directory outside the container's own writable layer, so the data survives container restarts and even removal:
docker volume create pgdata
docker network create app-network
docker run -d --name db --network app-network \
  -v pgdata:/var/lib/postgresql/data \
  -e POSTGRES_PASSWORD=devpassword \
  postgres:16
Chaining docker run commands like this gets unwieldy once you have more than one or two containers to manage together: that's exactly the gap Docker Compose for Node.js Development Environments fills, by declaring the network, volumes, and services in one file.
Common Mistakes
Not using a .dockerignore file. Without one, COPY . . sends your entire working directory (including node_modules, .git, and local .env files) into the build context. This slows builds, bloats layers, and can leak local secrets into an image layer. At minimum:
node_modules
npm-debug.log
.git
.env
.env.local
dist
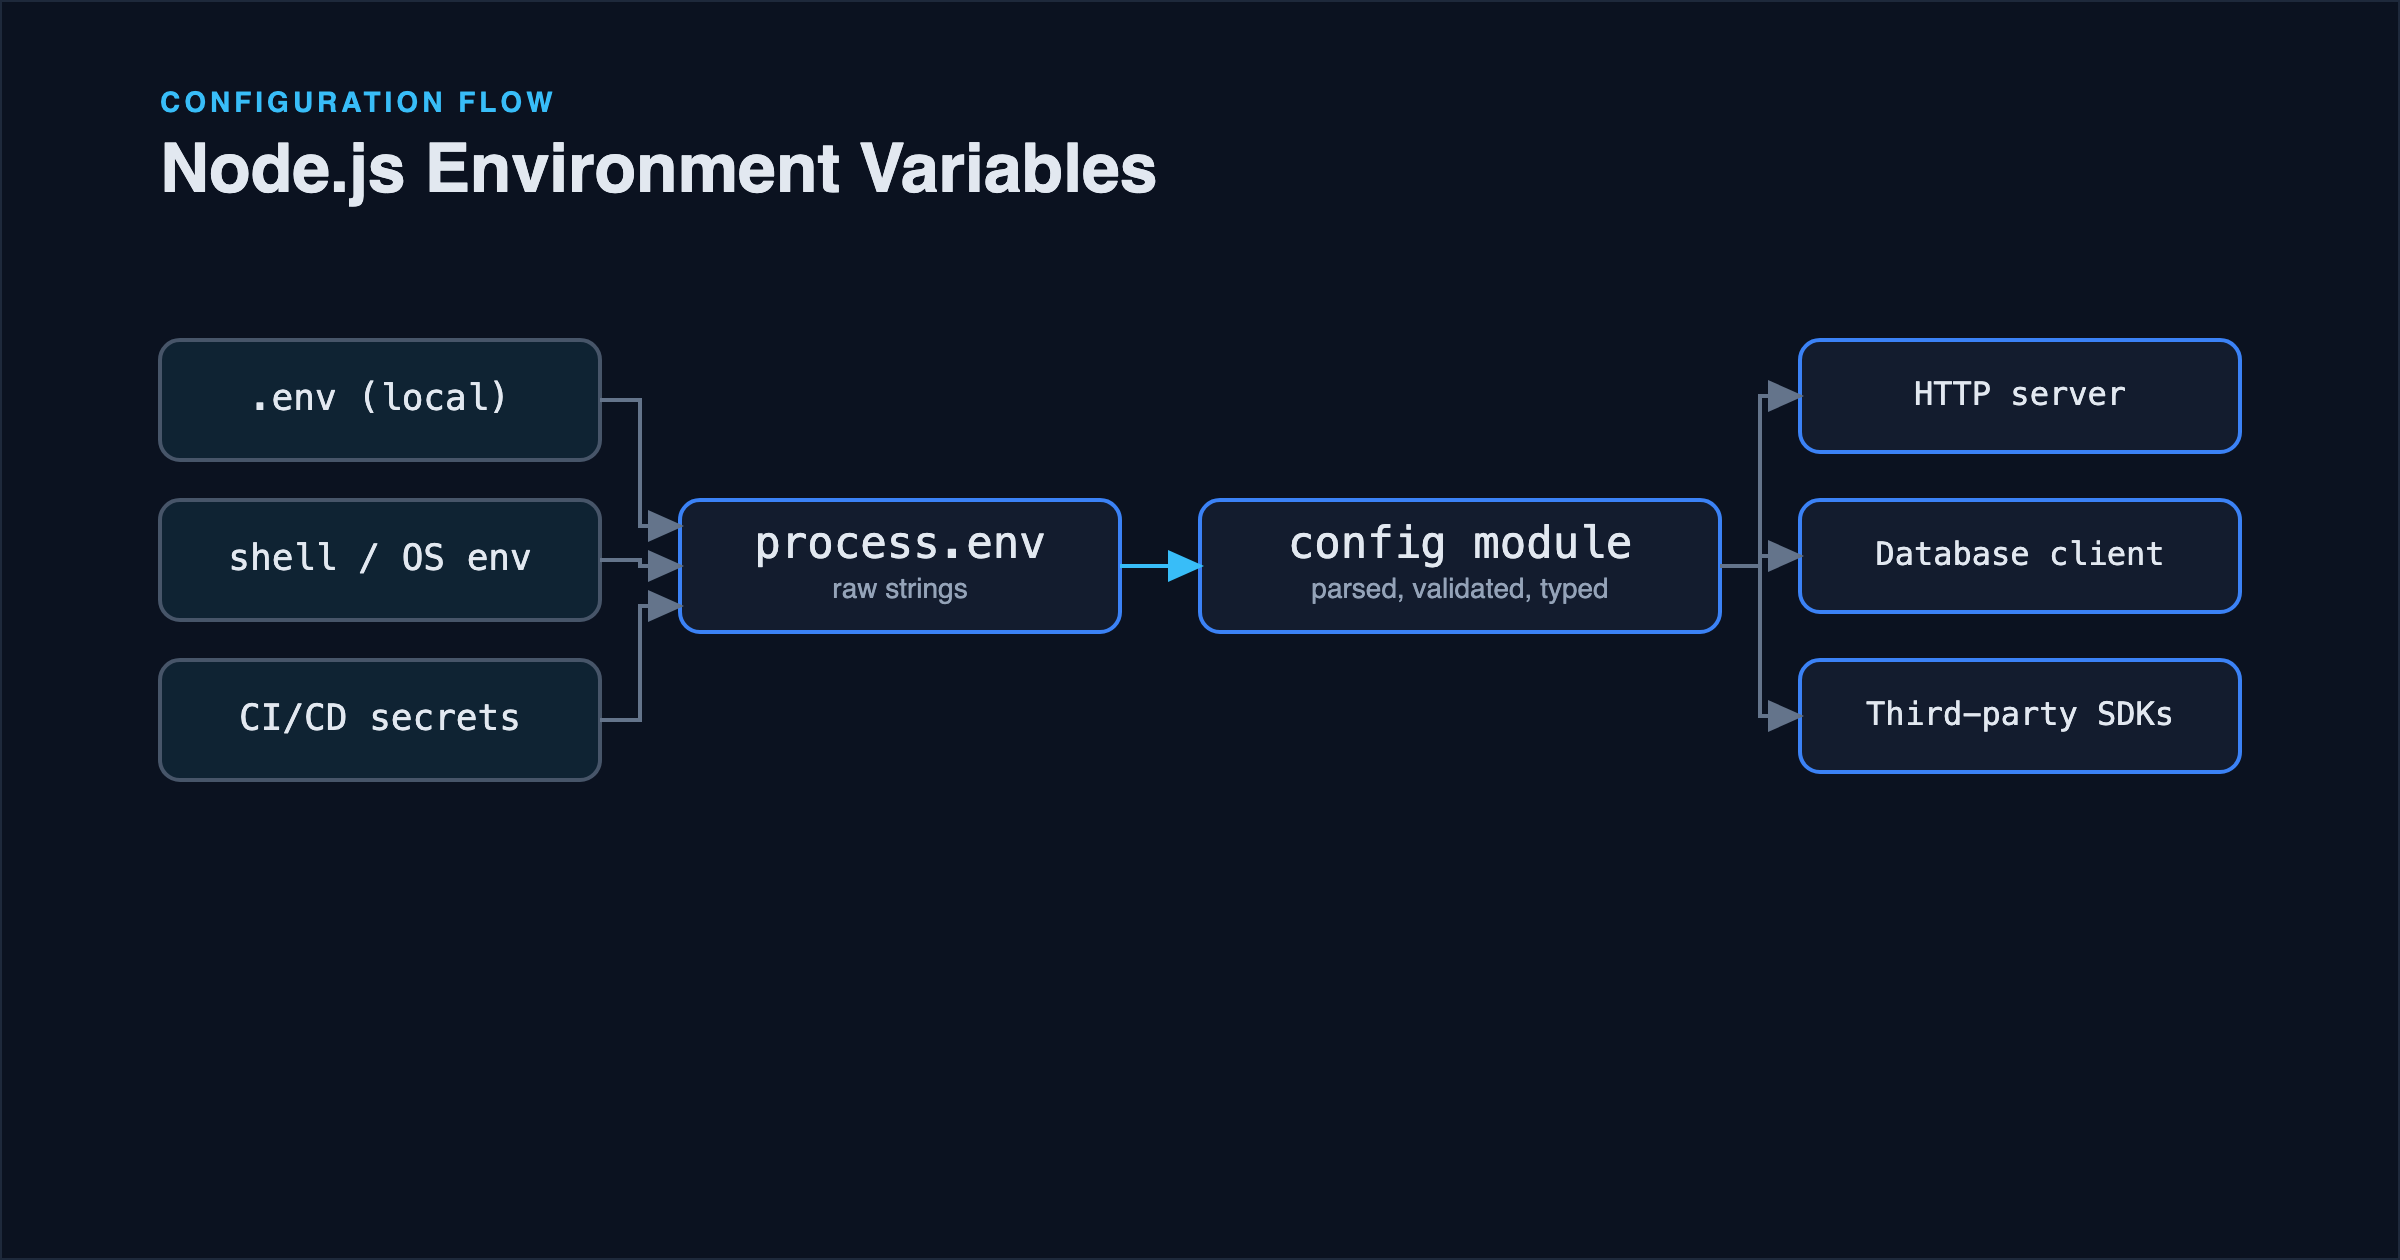
Baking secrets into the image with ENV. An ENV instruction in a Dockerfile becomes part of the image's metadata, visible to anyone who can run docker history on it. Database passwords, API keys, and tokens belong in runtime environment variables (docker run -e, Compose's environment:, or a secrets manager): never baked into the image. The companion article on Node.js environment variables covers structuring configuration so this separation is easy to maintain.
Installing dependencies with npm install instead of npm ci. npm install can update the lockfile and resolve slightly different versions depending on what's cached. npm ci installs exactly what's in package-lock.json and fails fast if the lockfile and package.json are out of sync: the reproducibility you actually want in a build pipeline.
Treating a container like a permanent server. Restarting a container should be a safe, boring operation that loses nothing important. If restarting one makes you nervous because it might lose data, that's a sign something is being written to the container's writable layer that should be in a volume or an external service instead.
Best Practices Checklist
- Order Dockerfile instructions from least- to most-frequently-changing, so the build cache actually helps.
- Always publish ports explicitly with
-pwhen you need to reach a container from outside. - Use multi-stage builds to keep build tooling out of the runtime image.
- Run as a non-root user unless there's a specific, documented reason not to.
- Persist database/state through named volumes, never through the container's own writable layer.
- Keep secrets out of the image entirely; inject them at runtime.
When a Managed Service Makes More Sense
Running your own containerized PostgreSQL or Redis is a reasonable choice for local development and smaller, self-managed deployments. But it's worth being honest about the trade-off: you're taking on backup strategy, failover, and patching yourself. For production workloads where availability matters, a managed database service is often the more pragmatic call, with Docker reserved for the application layer and local development. Containerizing everything isn't inherently more "correct": it's a decision with operational cost attached.
FAQ
Does every Node.js project need Docker? No. For a solo developer shipping a single small app to a platform that already handles the Node.js runtime, Docker adds a layer of indirection without much payoff. It earns its keep when you need environment parity across a team, multiple services that need to run together locally, or a deployment target that expects a container image.
What's the difference between Docker and a virtual machine? A virtual machine boots its own full operating system kernel, which makes it heavier and slower to start. A container shares the host machine's kernel and isolates just the process and filesystem, which is why containers start in under a second and you can run many more of them on the same hardware.
Why is my image so much bigger than expected? Usually one of: no .dockerignore (copying node_modules or .git), not using multi-stage builds (dev dependencies and build tools ending up in the final image), or using the full node base image instead of -alpine/-slim when your dependencies don't need the extra OS packages.
Conclusion
The core mental shift for a Node.js developer coming to Docker is treating the container as disposable and the image as the reproducible artifact: state that matters lives in volumes or external services, not in the container's own filesystem. Get the layer ordering right in your Dockerfile, keep build tooling out of your runtime image with multi-stage builds, and route inter-container communication through Docker networking instead of localhost. Everything else is refinement on top of that foundation.
References
- Docker documentation: Get started
- Docker documentation: Dockerfile reference
- Docker documentation: Multi-stage builds
- Docker documentation: Networking overview
- Node.js Docker official images